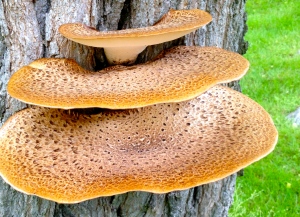
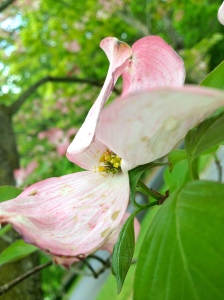
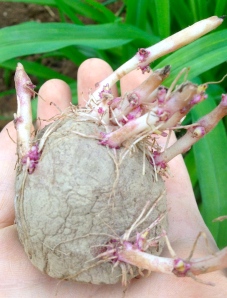
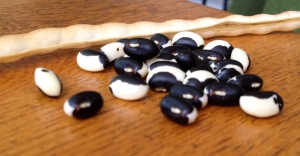
With the danger of frost long-gone, and the weather finally turning warm (read: unbearably hot and humid), I thought I’d just quickly show what’s taken shape in The Scholar’s Garden thus far! Since it’s just the start of the season, there’s little fruit to show, so I’ll be trying a new camera technique to bring you a closer look at the seeds that will bring life to our soil! I’ve also added in a few of the flowers that have recently bloomed, as well as a funny little tortoise who seems to be residing near our Japanese Maple. Just so you know, I haven’t forgotten about my promised post on herbal tincturing – that guide will be popping up later this week! For now, though, enjoy an early look at The Scholars Garden!
17 May
Non Succedat Omnia: Preparing Potatoes for the Plate (Part 2)
Over the past week, I’ve planted, sliced, mandolined, tossed, cooked, and finally baked more potato variants than I ever thought possible! And, throughout this week’s celebration of the lowly, yet ever-so-versatile spud, not all of my efforts have ended well. As the title of this post so cryptically suggests, “not everything succeeds;” a maxim that is frequently (and disappointingly) true in the time-intensive labors of gardening and cooking. In the garden, I was revolted to find that a whole batch of seed potatoes had melted into a fuzzy white paste, and in the kitchen, I tried to make baked sweet potato chips.
My first foray into baking potato slices began with what is, I still firmly believe, a fantastic recipe for chipotle baked sweet potato chips (which you can find {here}). Honestly, the chipotle and
brown sugar glaze that so delicately clung to each perfectly formed slice of golden veg smelled
(and tasted) like a gift from Ah Mun himself. However, due in part to our finicky, ancestral
oven which tends to burn hotter on the right than the left (or hotter on the left, if the weather’s just right); our slightly rickety baking trays that transmit heat faster than a Phoenix sidewalk; and my continual inability to remember the issues our oven and baking trays tend to have, every batch of sweet potato chips emerged from the oven coated in an undoubtedly carcinogenic blackness that could turn even the brightest of tuberous dreams to ash.
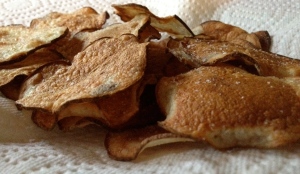
However, despite my continual failure in the area of sweet potatoes, I thought I’d forego the fancily enticing spices and return to the plain old potato for one final attempt at baking an edible chip. Thankfully, this is one story that did not end in failure.
Baked Potato Chips: Ingredients
Russet Potatoes
Olive oil or cooking spray
Sea Salt
Directions:
1. Preheat your oven to 475º F (245º C)
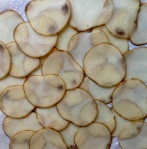
2. Using a sharp knife or a mandolin slicer, thinly slice your potatoes as evenly as possible (slices of varying thicknesses will require increased vigilance on your part as they cook)
3. Pat the slices with a paper towel to dry off the potatoes as much as possible
4. Lightly coat a baking sheet with olive oil or cooking spray, and arrange your dry potato slices in a single layer on the tray
5. Coat the slices with a thin layer of olive oil or cooking spray, and cook in your preheated oven until brown and crispy (typically between 6 – 10 minutes). I found that flipping the slices every three minutes prevented them from burning, and allowed me to check their level of crisp.
6. When your chips have finished baking, place on a paper towel and lightly sprinkle with sea salt.
My only word of warning with these potato chips is that once they’re ready to eat, you’ll find them quickly disappearing (the batch I made only two hours ago is already long gone)!
Needless to say, I’m quite thankful to be able to present a modicum of success after my initial potato-based disappointment. Hopefully now you will learn from my mistakes, take the plunge, and bake your own (addictive) potato chips as well!
That’s all I have on potatoes for now, but I hope you’ll stop in next week for a simple tutorial on herbal tincturing!
Until next time, happy gardening, cooking, and doing anything else that brings you joy!

16 May
Solum, Nocte, et Farinæ: Preparing Potatoes for the Plate (Part 1)
If there’s one thing I’ve learned during my brief lifetime in Central Pennsylvania, it’s that one must be willing to be versatile in order to fully enjoy this part of the world. When a single week in May can contain below-freezing temperatures on Tuesday, top out at 82 degrees on Thursday, and all the while be intermingled with menacing storms and revitalizing Spring breezes, it’s clear that versatility is the key to contentment around these parts. So, with versatility in mind, I thought I’d make (and present) one of my favorite, flexible recipes that uses the potato, which might just be the most adaptably simple, yet continually rewarding ingredient I’ve yet found.
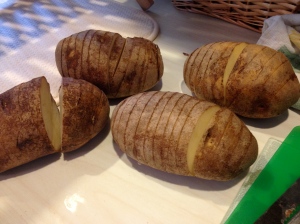
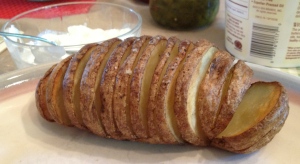
This Swedish style of potato prep is known as “Hasselback,” which simply describes the accordion-
esque manner of slicing your tubers before baking. As an inherent lover of all things different, I greatly appreciate the innovation this style of cooking brings to the time-worn baked potato, a culinary staple which has, I must admit, been boring me for years. The recipe I’m sharing with you today is a simple variation of seasaltwithfood’s original design, and is meant to be easy to alter to fit your favorite potato toppings!
Garlic Hasselback Potatoes: Ingredients
6 medium potatoes
4 – 5 cloves of garlic, sliced thinly
2 Tablespoons olive oil
2 Tablespoons butter (you may choose to use more or less, depending on your preference)
Salt and Pepper to taste
Directions
1. Preheat your oven to 425˚ F (220˚ C)
2. Place your potatoes on a cutting board so that they do not roll, and cut deep slits (almost to the base) into each potato, about an inch (3 mm) apart. I find that using a serrated blade gives you the most control for this step, which can help you avoid slicing straight through the potato.

I prefer a hefty amount of garlic with my potatoes, but you may certainly choose to use less (or more!).
3. Place your sliced potatoes on an ungreased baking tray, and insert the garlic into the slits.
4. Top each potato with an equal amount of butter and olive oil, and sprinkle each tuber with salt and pepper.
5. Pop the potatoes into your preheated oven, and bake for at least 40 minutes, or until the outer flesh of the potato is lightly brown and crispy, while the inside of the potato is soft and tender. Depending on your oven and potatoes, this step could take longer than 40 minutes (I usually need to leave my spuds in the cooker for at least an hour before they’re ready).
When your potatoes are out of the oven and on the table, your options for further garnishing
are only limited by your imagination! But, if you’re like me and would prefer some inspiration, here’s a link to a wide array of creative (and undoubtedly delicious) hasselback variations for you to try: Foodgawker’s Hasselback Offerings.
For part two of our foray into potato recipes, I’ll be giving baked potato chips a go (with hopefully successful results)! So stay tuned for (I promise!), the last potato post of this week!
Until next time, happy gardening, cooking, and doing whatever else brings you joy!

14 May
Solanum tuberosum Nocte: Preparing Potatoes for the Night
As I mentioned in my last post, one batch of my ever-so-scholarly Solanum tuberosums (potatoes) did find its way into the soil at the “ideal”
time prior to this week (which contains our last-frost date in central PA). This means that in one cramped edge of the garden, a patch of potatoes has emerged from the soil, ready to greet the warm spring sun! And, with the leaves of the tubers emerging, there are four things to keep in mind to keep your potatoes as healthy as possible!
Potato Maintenance:
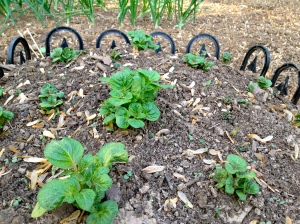
1. Weeding: Potatoes, being a tuberous plant, need as many nutrients as they can store, so they prefer to grow in areas free from weeds and close companions. This is especially important for me, since, as you might be able to see from the picture on the right, a host of other little greens have joined the burgeoning tubers. And, while I have equal respect for all plants, my respect is a bit more equal for the plants I actually try to grow, so the weeds and things inhabiting my potatoes’ space will have to relocate!
2. Watering: From the day you plant your potatoes, try to keep the soil around your potatoes moist. However, to avoid contracting a blight (a variety of fungal diseases that can plague potatoes), try not to water the leaves of the plants, and ensure that your potatoes have sufficient drainage (potatoes and standing water tend not to get along).
3. Insect Control: While the potato can be munched on by a select few insects and pests, their ties to the nightshade family renders much of the potato plant poisonous to most insect invaders. Having plants that can defend themselves is always a plus for the busy gardener!
4. Temperature: Even though potatoes are touted as a cold-loving crop, their tender shoots and leaves can still be crippled by an unexpected frost; so, even though the plant under the soil can survive a frigid attack, it will take another two – three weeks for an exposed potato to regrow its above-ground energy source. This means that proper precautions must be taken to keep potato greenery warm overnight.
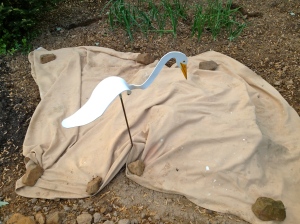
Here in PA, we’re expecting an unseasonably late frost (only a day before the last frost date!), so we’ve covered our potatoes with a sheet secured with rocks. You could use anything from newspapers to halved gallon jugs to keep your fragile plants safe from any arctic invasions!
That’s all the time I have for now: the rest of my shivering plants are in need of blankets before the night falls! Be sure to stop in soon to catch the third and final part of my potato triad: Solum, Nocte, et Farinæ: Preparing Potatoes for the Plate!
Until next time, happy gardening!
14 May
Solanum tuberosum Solum: Preparing Potatoes for the Sun
As I emerge from the haze that’s enshrouded my past four years as an undergraduate student, I’m coming to the startling realization that Spring has finally unfolded across central PA!
And, while I am eagerly awaiting May 15 (our last-frost date here), I’m having to rush to complete my early-Spring gardening checklist in time, which would, of course, be far easier if I actually had an early-Spring gardening checklist prepared! As it stands, however, in the madness of graduation, certification, job hunting, and substitute teaching, fragments of my gardening knowledge are slowly resurfacing to remind me of what needs done before the illustriously imminent last-frost date arrives!
The Task at Hand: Finding the Right Time
First on that ever-expanding list of things to do? Finally plant my favorite member of the Solanum, or nightshade, family: potatoes! The best time to plant potatoes is, ideally, two – three weeks prior to your area’s last frost date, as the potato shoot takes about this long to emerge from the ground; however, in our garden, only one set of potatoes actually got planted at that time, so the other two varieties we’re currently growing have only just been put into the soil. As the potato is a cold-friendly plant, try not to wait too terribly long past your last-frost date to put these spuds in the ground! You can find your last-frost date (in the United States) here!
How to Prepare and Plant Your Potatoes
Each year when I go to plant my freshly-purchased bag of seed potatoes, I find that I’ve long since forgotten how to go about planting these admittedly odd-looking tubers.
So, I thought I’d compile a step-by-step guide to prepping and planting potatoes (for my benefit and hopefully yours)!
Obtaining and Preparing:
1. Find a source of seed potatoes in your area (avoid planting grocery store tubers, as these tend to be treated with chemicals to prevent sprouting), and choose the varieties that speak to you. This year, I’ve gone with Reds, Russets, and Kennebecs, just for these varieties’ “cookability.”
2. Place your seed potatoes in a cool, dark place for two – three weeks to allow them to sprout (if they haven’t already).
3. When the sprouts are about a 1/2 inch to an inch (1.5 – 2.5 cm) long, they’re ready to plant.
4. Using a non-serrated knife, cut your seed potatoes into chunks with at least two eyes/sprouts each. You may choose to let these chunks sit for a day or two to allow a “skin” to form over the cut edges. I’ve heard conflicting reports of whether this step is necessary, but, so far, I’ve yet to hear that this is detrimental to your future crop, so I’ll let you decide whether or not to “skin” your potatoes!
Finally Planting Your Potatoes
1. When your Solanum tuberosum chunks are ready to plant, find a sunny spot in your garden to
dig your potato trench. The trench should be long enough to allow for about 12″ (30 cm) of space between each potato, and between 3″ and 6″ deep (9 – 15 cm).
2. Line the bottom of your trench with rich organic compost or rotted manure, and fully incorporate your chosen fertilizer with the soil (this will give your tubers the boost they need to emerge healthy and ready for the sun!).
3. Place your potato chunks into the trench with their sprouts pointing up, 12″ (30 cm) apart.
4. Cover completely with soil and keep moist. You’ve just successfully planted a potato crop!
While putting in your potatoes is just one aspect of the early Spring countdown, it’s certainly one of my favorites! Of course, once your potatoes start sprouting, they will need to undergo some slight maintenance to ensure a solid harvest, so stay tuned to my coverage of potato upkeep in Solanum tuberosum Nocte: Preparing Potatoes for the Night!
As always, happy planting!
23 Jan
A Little Egg with Your Tea
With winter finally baring its frigid fangs here in central PA, even I, a lifelong proponent of colder 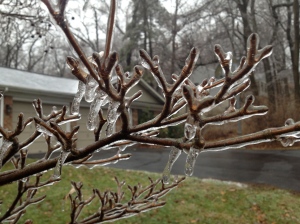 temperatures, have taken to wishing for warmer climes. But, with schoolwork and student teaching compelling me to weather at least one more icy winter here, I’ve resorted to finding (typically culinary) ways to keep the brumal blues at bay! Lately, my quest for cold-dispelling recipes has led me to finally trying dishes that I’d favorited and bookmarked over the years, but had never actually attempted. First on this list of “eventual eats” was a recipe for Chinese Tea Eggs that I discovered here nearly a year ago. Captivated by the incredible look and purported flavor of these eggs, I knew I had to give ’em a go!
While the tea eggs are extremely easy to make, do ensure that you have enough time to allow the eggs to fully absorb the color/flavor of the tea! I made the mistake of starting my batch rather late at night, so the eggs I ended up with were a tad lighter than the traditional tea egg. However, even though the coloring was a bit pale, the flavor of the eggs was powerful and peculiarly delicious! Plus, as an added bonus, the tea and spices infused the kitchen with an incredible chai-like aroma while the eggs were steeping!
Chinese Tea Eggs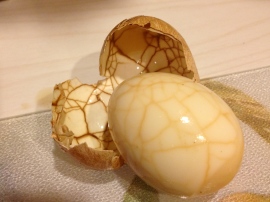
Cooking time: Approximately 2 hours
Ingredients
6 eggs
4 black tea bags, or 2 tablespoons of loose black tea leaves
2 teaspoons of Chinese five spice
1 tablespoon coarse salt
(Optional) Toasted sesame seeds
Instructions
1. Place eggs in a large pot and fill with enough cold water to cover the eggs. 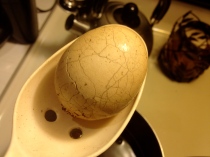
2. Bring water to a boil over medium heat and let simmer for 12 minutes.
3. Remove the eggs from the water, and with a spoon, tap the eggs until the shells are covered with cracks.
4. Return the eggs to the pot of water and gently stir in the tea, Chinese five spice, and salt.
5. Cover the pot, heat gently, and let simmer for one hour.
6. Remove the pot from the heat and leave the eggs to cool in the liquid for 30 minutes.
7. Take one egg from the liquid, and peel to determine whether your eggs are dark enough, or if they need to remain in the liquid longer.
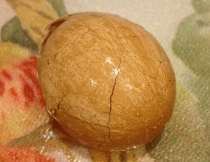 8. When you’re satisfied with the color of your eggs, remove the whole batch from the water and allow to cool fully.
9. With your eggs completely cooled, peel each egg (taking time to admire the fascinating coloration of the shells), and enjoy! You may also wish to garnish your eggs with toasted sesame seeds before serving.
Without a doubt, the process of creating a clutch of Chinese Tea Eggs wholly served to keep my mind off of the near sub-zero temperatures outside! I can only hope that they’ll do the same for you!
Until next time, happy cooking, gardening, and doing whatever else brings you joy!
6 Aug
The Beans of Bos
Among my close friends and relatives, it’s common knowledge that I’m quite set on one day owning a small farm. When I have little else to do, I’ve been known to peruse
chicken catalogues, ponder the logistics of utilizing cows as petrol-free lawnmowers, and daydream about the day I’ll finally be able to purchase my own herd of ridiculously adorable Olde English Southdown Sheep. However, while my current occupation as a full-time student is helping me realize my dream of becoming a high-school English teacher, the amount of time (and money) required to make it through the world of higher-ed has proven only to hinder my dreams of moonlighting as a part-time farmhand. So, what’s an aspiring homesteader to do? Well, grow cowpeas of course!
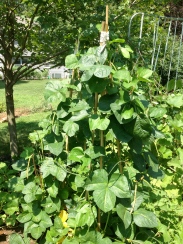
Granted, while the plants classified under the moniker of “cowpea” (or “Vigna unguiculata” for the Latin-minded) have no relation to our milk-giving friends in the genus Bos, a particular strain of this prolific crop seems to indicate otherwise. This strain, known as the holstein cowpea (available for purchase here), has won my heart, and now stands as one of my all-time favorite crops (especially in a land devoid of actual holsteins)!
Not only are the beans of these peas delightful to the eye, but they’re a blessing to a busy gardener as well! To be sure, this crop has been the one plant in this year’s garden which has yet to worry me. While I was fighting flea beetles on the eggplants, squishing cabbage worms around the broccoli, and pondering over how to get the forever-climbing gourd vines out of the nearby trees, these peas grew unencumbered and without issue. The only difficult (if one can call it “difficult”) aspect of planting this legume is deciding where and how to plant it in your space. So, I thought I’d provide a few tips and tricks for adding cowpeas to your yearly harvest!
Picking a Location for Your Cowpeas
1. Climate
As these plants originate from Africa, they are not particularly cold-hardy, therefore, warmer climes will ensure a stronger start for your plants.
2. Sun and Moisture
Since these legumes put out a high volume of fruit, a spot in your garden that receives full sun for most of the day is essential for the well-being of your peas. An area with well-draining soil is also a plus for peas: too much moisture can cause leaf-yellowing, disease, and rot.
When and How to Plant Cowpeas
1. Timing
Plant your seeds after the last frost date, and when the soil is at least 65 degrees F (if you
plant tomatoes, put these two crops in at the same time).
2. Spacing
Officially, cowpeas should be planted with 3 inches between each plant, in rows 3 feet apart. However, most cowpea varieties can withstand and thrive in more crowded conditions. If your peas are a vining variety, you can also train your plants up trellises or tripods (this is the method I chose to use with my holsteins, with help from this video guide: “How to Lash a Bamboo Tripod”).
Waiting and Harvesting
1. Germination
Within approximately a week to 10 days, you’ll
see the little cotyledon (seen below) begin emerging from the ground. This is a particularly vulnerable period for the plant, as any significant damage to the cotyledon 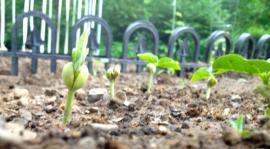 will prevent the pea from regrowing buds. Placing a small cage or fence around your baby beans can be useful if you have seedling-devouring critters in your area!
2. Harvesting
As your peas begin growing, they can be harvested in three different forms. First, the young leaves can actually be eaten as greens, and can add a rather attractive touch to a garden salad!
Most commonly, however, the fruit, or bean, of the plant is what you’ll be after. While the pods are still young, the beans can be collected and eaten “green.”
If 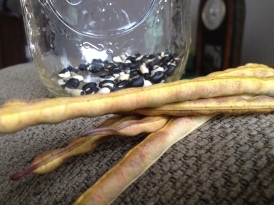 you’d like to store your beans as seed, or you have a favorite recipe which calls for dried beans, you’ll have to wait a few extra days, and harvest the pods when they are dry and yellow.
When the time comes to finally pick your peas, don’t be alarmed if you see a cloud of wasps orbiting your plants! Although the sight of these predatory, stinging insects can be quite alarming, they’re actually there to help make your job even easier! It would seem that the wasps are drawn to a sap excreted by the peas, and then stick around to eat the harmful insects that would like nothing more than to bite into your hard-earned harvest! From my own experience, the wasps paid no attention to me as I plucked the pods around them; and, after a few trips to the vines, I was able to actually enjoy watching these typically fearsome creatures go about their work!
Whether you are, like me, yearning for a bovine imitation, or would simply enjoy growing a deliciously obscure variety of pea, I really cannot recommend the holstein pea highly enough! Hopefully you’ll consider adding this eye-catching and nitrogen-fixing legume into your garden next year!
Until next time, happy gardening, baking, and doing whatever it is that brings you joy!

26 Jul
A Tale of Two Queens (Part 2)
When our story last left off, the swarm’s matriarch had gone missing, leaving only anarchy to reign in the hive. Well, it wasn’t complete anarchy, I suppose. Even without a queen, the bees continued to construct their extraordinary honeycomb. Not only were we able to witness the final product of our insect’s architectural abilities, but, as we further inspected the 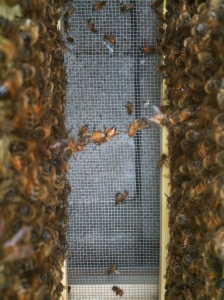 hive, we were able to catch the girls in the act of building comb! In the picture to the right, you can see what looks like a tightrope of bees between two frames of wax. This is, I eventually learned, called “festooning;” and, while its true purpose was a mystery to me, it indicated that our builder-bees were hard at work putting together their new home!
Despite this slightly humorous indication of progress, I was still in a bit of a panic due to our queen’s decision to abdicate her throne. Although I had hated to again bother Mr. P., the president of our county beekeeping association, this was a situation I knew Eric and I could not tackle alone. Upon listening to our woeful tale, Mr. P. advised that we wait a week in case the queen had simply left on a mating flight (the only time an acting queen should leave the hive); and, if she had not returned by then, he had a last resort in mind for our hive.
When the torturous week at last came to a close, we returned to the hive; hearts heavy, and minds swirling with thoughts of impending doom. When we at last mustered the courage to look inside the hive, we were met with the actualization of our deepest fears that had haunted us for the past seven days: the queen still had yet to return.
We were able to tell this because we were visually unable to locate the queen (this does not necessarily mean that the queen is gone, as she can be quite stealthy when she wishes); the workers were still placing food and water in the cells at the center of the frames (a reigning queen will not allow these central cells to be used for anything besides eggs in a normal hive); and, the production of empty queen cells had continued.
Without hesitation (I was still standing in front of the precariously open hive in my bee suit), I frenetically placed a call to Mr. P., in hopes that he would have some sort of resolution to this ongoing problem. After a few heart-pounding moments of silence, he offered to help out in the last way he could: by giving us a new queen. Apparently, one of his hives had been over-producing queen 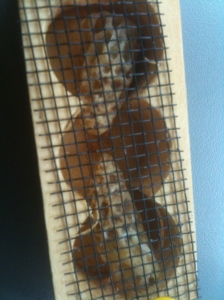 cells; but, instead of remaining empty like the ones in my hive, his had been filled with eggs by his current queen, stuffed with royal jelly by dutiful nurse-bees, and eventually capped by the hive’s architects. So, after accepting his offer for two queen cells, I (legally) sped over to his apiary and was presented with what appeared to be two peanuts in a queen-cage (which you can see on the left).
Inside these elongated cells lay two, metamorphosing pupae on the road to queen-hood. Now, you’re probably wondering why I was given two queens (and how I can still title these posts as the tale of TWO queens, when there are now clearly three); and, I’ll admit, I wondered the same thing at the time. As it turns out, one queen must hatch first in order to assert her dominance over the hive. She does this by first emitting an admittedly odd buzzing/humming sound called “piping” (A video of this can be found here: “Virgin Queen Honey Bee Piping.”) as a way to announce her plans to take over the hive and call the workers to fight alongside her in her quest for glory and power. Following this vocal display of superiority, the newly-hatched queen will tear open the cells of any queens in her vicinity and fight them to the death. Whichever queen comes out on top is allowed to rule until she dies or is deemed unfit by the workers (I’ve said it before, and I’ll say it again: bee politics are weird).
Now, here’s where our story takes a slightly gruesome, and ultimately unhappy turn…
The queens I was given had been incubating for approximately a week and a half, meaning that there were only a few days left until one of the queens emerged (a royal bee stays in the cell for a period of fifteen to seventeen days). After offering my heartfelt-thanks to Mr. P. (especially after learning that the acquisition of only one queen would usually cost up to $40 from a professional queen-farm), I returned to the hive to install the cells.
In a few days time, we again returned to the location of the hive in hope to find some sort of queen activity. We had no idea what we were in for.
Even as we approached the hive, we knew something was happening. The bees inside were a bit louder than usual, but, being that it was a slightly warm day, we shrugged this off as being the bees’ natural air-conditioning system. However, as we got within arms-length of the hive, we saw something incredible unfold. A large, rather queen-like bee was being wrestled out of the hive’s front gate by two or so worker bees. These selfless bees were essentially cleaning up the result of this colony’s latest royal war.
Emboldened by the events unfolding before us, we clambered into the hive to find the bee who stood as the last vestige of hope for our ever-aging colony (since bees only have a fifty-day lifespan, our workers only had a couple weeks of life left before their time ran out). Without having to pull out a single frame, we saw our new queen perched atop the hive; and, I swear that a look of accomplishment and triumph could be seen in her five eyes. Content with this discovery, we blissfully returned home to alert everyone of this great news.
What we did not know was that the power of the new queen was anything but secured. Although she appeared in control of the hive, something dreadful would occur between the time we left the hive and the date of our next visit. When we next visited the hive around two weeks later, we were met with every beekeeper’s worst nightmare. Not only could we not find the queen, but no eggs had been laid, the order of the cells was still in disarray, queen cell production had again begun, and we were offered the rare (but unwelcome) opportunity to witness what amounted to the death-knell of our hive: a laying worker.
When the worker bees begin laying eggs, a hive is essentially beyond repair. What is unusual (but still quite fascinating) about bee anatomy is that all female bees, not just the queen, can lay eggs; but, this instinct is repressed by the pheromones released by a laying queen. In the event that these pheromones are not present (which was the case in our hive), the workers are free to begin laying unfertilized eggs. Unfertilized bee eggs are quite different from eggs of other animals, in that they will actually grow and develop into new organisms; however, due to a process I’m not entirely sure that I understand well enough to explain, only male bees will hatch from an unfertilized egg, eventually causing the hive to be overrun by bees who do nothing to benefit the hive.
One frantic call to Mr. P. later, and we were left without any more options. It was official: our first hive had failed. We tried to take some solace in the fact that our hive wouldn’t truly die off. Certainly, the workers would soon disappear; but, the males who were left behind would abandon the hive and venture into the great unknown. Once they find new, wild queens they will carry on the spirit of our hive in countless colonies throughout the area.
Nevertheless, although we have yet to clean out the hive and remove the now-vacant beeswax, we have officially hung-up our suits for this year.
But! I hope that this tale does not sway anyone away from the joy of keeping bees!! Our story is a bizarre exception to the rule of backyard beekeeping. While the global populations of wild bees are dwindling, novice beekeepers may very well turn the tide in this worldwide disaster. Even though our first year has ended in bitter defeat, Eric and I will return to the backyard battleground next spring to valiantly fight against the demise of the bees!
Well, now that my beekeeping tale is done, I promise to return to a far more light-hearted topic next time: the garden! With several months of growing now behind us, I do believe that a true gardening post is in order (this IS a gardening blog, after all)! Plus, I’ve been able to test out quite a few recipes over the past few weeks that need to be shared, so stay tuned for a few updates from the Scholar’s Kitchen, as well!
For now, though, my time is up! Happy Gardening, and good luck with your summer adventures!

27 Jun
A Tale of Two Queens (Part One)
As seems to be the case with each of my postings of late, I must preface this tale with an apology. My lack of posting for the past several weeks can be summed up in the following, rather flimsy, excuse: due to a combination of a new job, a family vacation, and sheer reluctance to put this story to proverbial paper, I have been exceedingly lax in my writing. And for that, I must apologize.
With that nasty business over with, you might be wondering why this particular posting would cause such hesitation that I would wait this ridiculously long to share it. Well, to answer that hypothetical question, it is because I have already seen the end of this all-too-true story, and the main characters will not live “happily ever after.” But, before I spoil the ending, I present to you the first half of, “A Tale of Two Queens.”
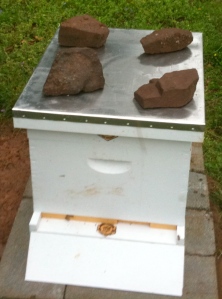 When Eric and I next checked on our hive (after the events in “A Most Apiaristic Experiment”), we were excited to discover what had become of our buzzing brood. With a mixture of childlike wonder (“There are several thousand bees in that box! We’re actually keeping bees!”) and time-brought pessimism (“We probably did something wrong and the bees flew off, or died, or were attacked by a herd of marauding bears.”) resonating in each step we took towards the hive, we began noticing a few, encouraging bees fluttering in and out of their new home. With my “Beekeeping for Dummies” book in hand, Eric removed the top cover of the beehive. In a matter of seconds, we were well aware of the life swarming inside this unassuming, white container.
After a moment of awe brought on by the sheer number of stinging insects that we were now going to handle, we made quick work inside the hive. With the nearly identical words of every beekeeping guide I had read up to this point ringing in my ears (“Find the queen!”), we tiptoed into the hive, and began our search.
The first place we had to inspect was the queen cage (the small box that housed the new queen, giving the rest of the hive time to adjust to her scent and authority). Although the cage was covered in bees, we decided to test our mettle as beekeepers and stuck our ungloved hands into the mass of insects, and carefully extracted the box (while not wearing gloves is, I’ll admit, the absolute best way to inspect a hive, the first time you stick your bare hand into a group of several hundred bees will be an experience you won’t soon forget!). Although a few of her majesty’s royal attendants had perished in their chamber (most guides said that this would be the case, and that it was not cause for alarm), the candy door which kept the queen inside her prison had been removed, meaning that the queen had, without a doubt, entered the hive. With our initial fears assuaged by this discovery, we delved deeper into the nine, now-humming frames of clean, white beeswax in order to make sure that the queen was alive and well.
We found the outer six frames almost entirely empty, typical for a freshly installed hive, and so our royal search continued. 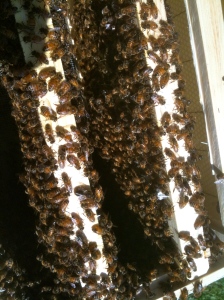 Frames seven and eight, completely covered in bees (as you can see in the picture on the right), also turned up empty for our queen. Frame nine had minimal activity, and, like the other eight, no queen. We knew that the queen would be hard to spot (even trained beekeepers can’t find their queens each time they inspect their hives), but we were truly disappointed by our undiscovery.
But, just as we were about to reseal the hive and traipse home, we saw a flash of white dash across the bottom of the hive! This could only be the queen, herself, marked with a white dot by her original owner to increase her visibility. Oblivious to our feelings of success, the queen made a hasty exit out the front door of her hive. That made us stop cold. You see, queen bees do not leave the hive except to mate, an occurrence that should not have happened for another week or two. But this queen, either ignorant or simply defiant of the thousands of pages of scientific study devoted to bee-behavior, was outside.
Surrounded by her royal court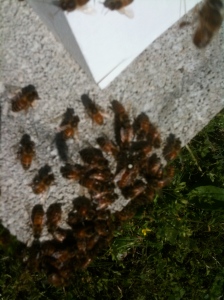 (she’s the white dot in the slightly blurry picture to the left [it’s very difficult to focus a camera while wearing a mesh veil]), our queen had apparently rejected the remainder of the hive still inside. Because we were absolutely baffled, not to mention worried, we phoned the president of our local beekeeping association; and, we were a tad unsettled by his answer to our dilemma. “I have never heard of a queen doing that,” he told us, “I can’t think of a reason why that would happen.” We stopped cold at that, too. If the most highly revered beekeeper in our area was stumped, what hope did we have of resolving this situation?
Thankfully, he did provide several, helpful techniques for reintroducing the queen to the hive (One of which involved re-caging her, a process I was more than a little fearful of performing.). As soon as possible, Eric and I drove out to the hive and proceeded to airlift the queen (using a combination of sugar syrup, cardboard, and our bee brush) back into the hive. Once inside, the queen meandered back into the frames, and disappeared from view. The fact that the workers allowed her to live, instead of performing a six-legged rendition of “Macbeth,” heartened our faith in the hive, and we left in considerably brighter spirits.
Because the queen would need time to readjust to indoor life, we waited about a week before inspecting the hive again. Back inside the hive, we began finding all sorts of interesting things filling the bees’ perfectly formed honeycomb. The workers had neatly arranged cells of water and multi-colored pollen and nectar to form dazzling arrays, rivaling the most intricate stained-glass. But, in addition to “simple” comb, several out-of-place structures were being formed by the bees.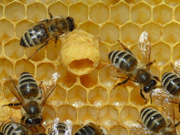 These basket-like projections from the wax were queen cells (seen in the image to the right), and their presence only meant one thing: the queen was gone.
I do hate to end my story here, but I feel that I must. However, now that the beginning of this story has been written, the ending will be quick to follow!
Hopefully I’ll see you back here for part two; but, until then, happy gardening!


